Files
If you do not see a tab called "Files" when you are logged into your account, the organization does not allow you to access your files via the Client Portal.
- Mobile user, and looking for instructions on Files? Click here!
- Desktop/PC user, and looking for instructions on Files? Click here!
Table of Contents
Files - The Basics
You and your specialist(s) can upload and download files directly to and from your eLogic Genesis record. The Files section houses all uploaded documents. Rather than using a folder system to organize your files, all files can be tagged to categorize and organize them.
Your specialist may request that you upload certain documents to your record. You may also need to upload certain kinds of documents before submitting a program application (more on this under Required Files (Program Applications) - The Basics below).
Documents can be uploaded via both desktop/laptop computers or mobile devices.
Required Files (Program Applications) - The Basics
Some program applications require you to upload specific files to your record before you can submit them for a specialist's review. If a program requires these file types, they are shown in the program application's Required Information section under Files.
After you upload files for a program application, you will need to indicate which requirement the updated file fulfills.
Required Files - Desktop Overview
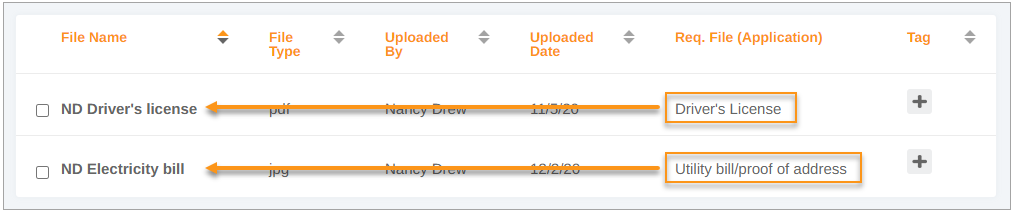
The Files tab has a column called Req. File (Application). In the Req. Files (Application) column, you'll notice ![]() plus icons for each file. When clicked, you will see a drop-down list that contains a general description of the file required for the program application.
plus icons for each file. When clicked, you will see a drop-down list that contains a general description of the file required for the program application.

When clicked, the ![]() plus will become a drop-down list, containing each of the required file types:
plus will become a drop-down list, containing each of the required file types:
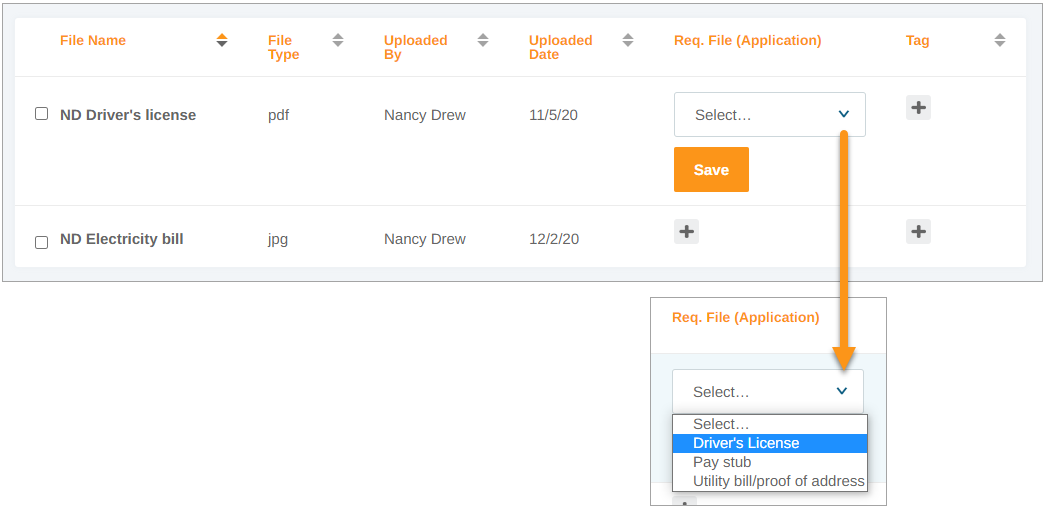
For the program application to update and confirm that each required file has been uploaded, all required files must be identified and assigned using this drop-down.